Collaborating with Issues
Issues is where a project team comes together to share, collaborate and communicate using defined workflows to get the results you need to power your project forward.
Creating an Issue
Issues are accessed from the Issues tab at the top of the page.
The page layout consists of a table of all Issues for the project with a search bar to locate Issues no matter their status and filter functions to tailor the table to fit your needs.
For a new user the table will be empty. Buttons for list filters and a Search Bar are available for helping sort and manage Issues as the project progresses.
To begin, select the +New Issue button 
A dialog box will appear requiring the following fields to be input: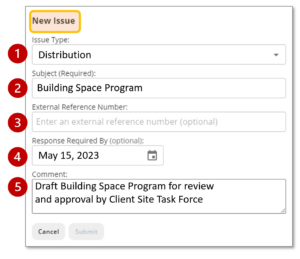
- Issue Type – Select the type of workflow. The default, and most common, is DISTRIBUTIONS
- Subject – this is required field to define the title of the Issue. Create a title that provides a clear description of the subject matter.
- External Reference Number – by default Concert will automatically assign a reference number to classify the issue and the workflow. If your organization has a custom numbering structure you may add this here.
- Response Required (Optional) – for some Issues the sender will want the recipients to provide a response or feedback. This field establishes a deadline for all participants and sends an additional notification to the recipients that they are required to respond to the Issue.
- Comment: this sets the context for the Issue. Notes or instructions written here will be included in the notification email sent to participants.
Select the Submit button to continue.
Constructing and Working with an Issue
The Issue page, commonly a Distribution, has four components:.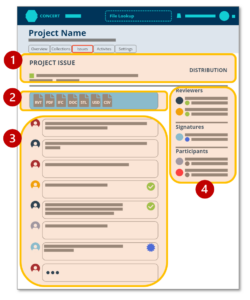
- Issue Header – essential information regarding the issue, its purpose, and the timeline (if any).
- Reference Collection – where the Collection of Assets to be shared is defined.
- Issue History – a threaded conversation area for sharing messages as well as providing an event record over the course of the Issue’s life.
- Reviewers/Signatories/Participants – where recipients are identified and given accountable roles when needed.
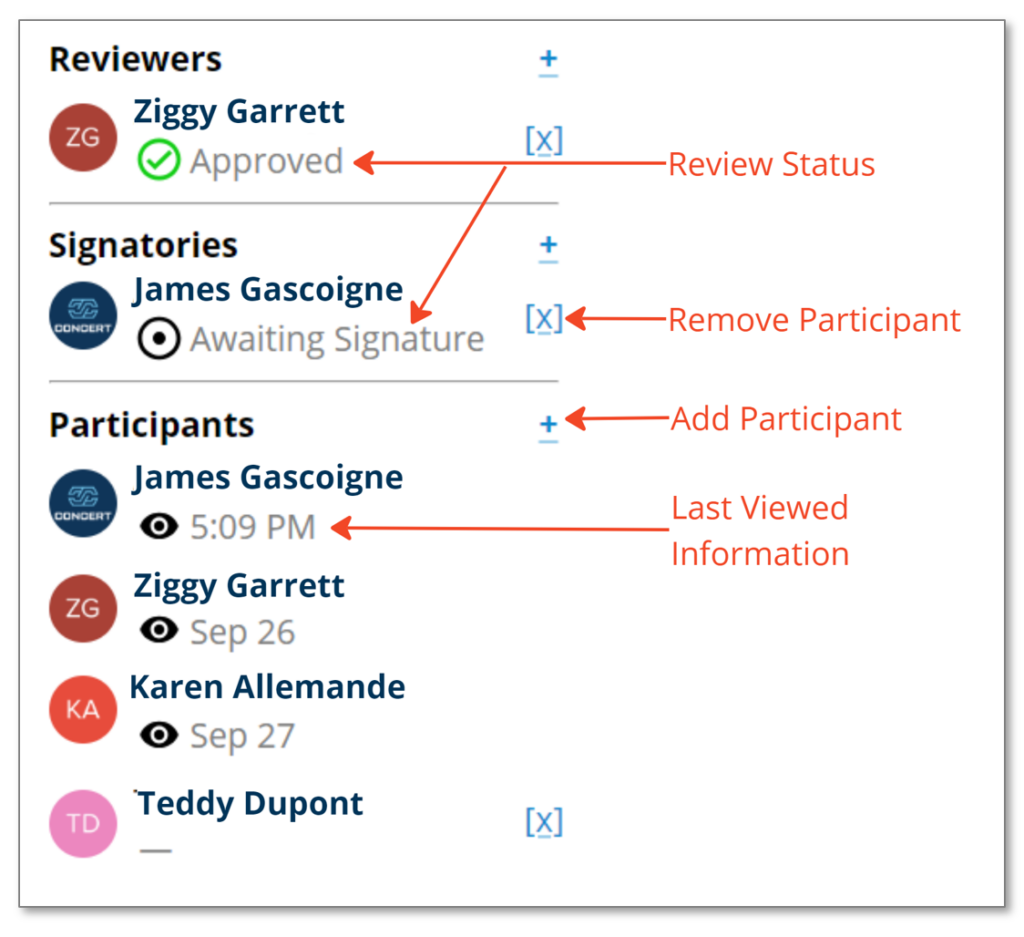
- Reviewers – recipients who are asked to perform an additional duty of reviewing the shared Assets and providing feedback as required by the messaging in the Issue History comments.
- Signatories – recipients who are required to Apply a Digital Signature to certify or sign-off on the distributed Collection.
- Participants – recipients who’s sole responsibility is to download the Collection Assets.
The Participants list will also show the names of those designated as Reviewers and Signatories. The Participants column will display the if a Participant has visited the issue and time stamp of their last visit.
To issue information two criteria must be fulfilled:
- A Collection must be identified as the Reference Collection
- One or more Participants must be defined. Reviewers and Signatories are optional and can be added only if needed.
To add a Participant select the + button next to the desired category. Selecting the + will bring up a dialog box that provides the option to select a project User to add them to the list. Selecting Users as Reviewers or Signatories follows the same process.
If a new User is desired the Edit Project Access link will provide the User / Access dialog box to invite additional people to the Issue. See Managing Users for more information.
Note: only those with Administrator or Register/Create/Sign Access will be permitted to add additional Users.
To add a Collection select the Set Reference Collection link and either select an existing Collection or select the Stage New Collection button to create a Collection for the Issue.
Once these criteria have been fulfilled all Participants will receive email notification about the Issue and their accountability.
Additionally, if the reference Collection is changed a new notification will be sent out to indicate that new Assets are available for use.
Issue History
The Issue History section is a dynamic channel conversation. Using the Comment box at the bottom of the page a Participant can provide comments, engage in a conversation and also drag-and-drop new files as needed to supplement the information exchange.
Reviewing an Issue
If the Participant is also listed as a Reviewer the Comment box will have an additional Review tab. Selecting the tab will allow the Reviewer to Approve or Reject feedback by selecting one of the available buttons. The review also requires a comment to give context to the approval or rejection before the response can be submitted.
Resolving an Open Issue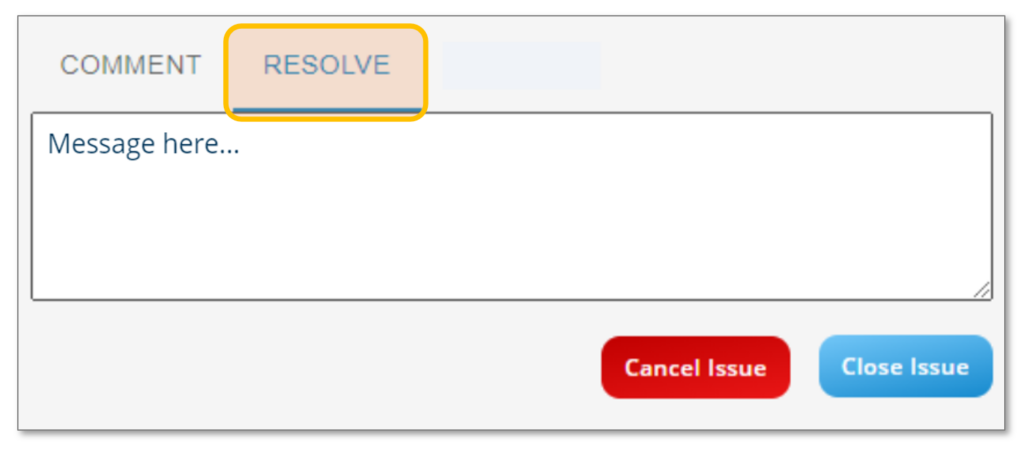
There are two ways to Resolve an Issue: Close or Cancel. This function is accessible as a tab on the Comment box at the bottom of the page to the person who created the issue or a User with appropriate administrative rights. To Resolve the issue, select the Resolve tab and then option you prefer. Leave a comment if appropriate. The status of the Issue will change to Closed or Canceled on the project table of Issues.
If there are any open reviews or signature requests the Issue will not be permitted to be closed.
This process is not permanent. Closed or Canceled Issues can be re-opened if needed.