


Integrations are a great way to routinely exchange data with your favorite platforms to Concert. With our BIM360 integration, Concert accesses published data files and creates a registered version as an Asset for your use in collections and Issue workflows.
Concert cannot access BIM360 files that have not been published
Pre-Work
Before a BIM360 integration can be established the Agave API app must be first installed from the Autodesk App store. This is a one-time installation and only needs to be performed by the project administrator setting up the integration.
First, navigate to the Autodesk App Store – https://apps.autodesk.com/
Search for Agave and select Agave API by Agave API.
Install the Agave API app. This may require logging into your Autodesk BIM360 account to complete. Otherwise, the installation takes only a few seconds.
Integration Setup
Login to Concert and navigate to the Settings tab of the project
Select Integrations from the side menu
Select the Add Integration button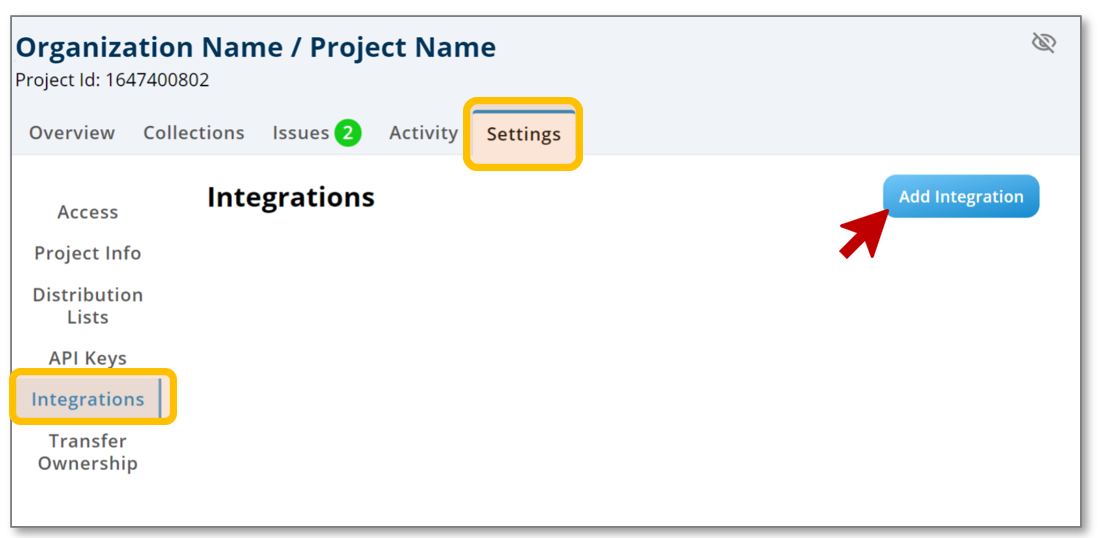
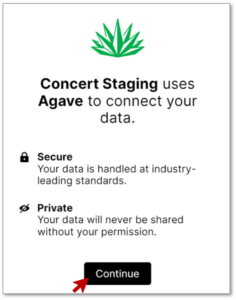
At the Agave dialog box select Continue
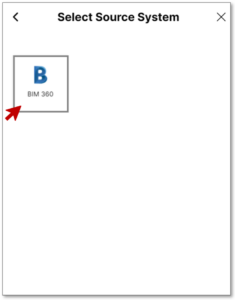
On the next Select Source System dialog box select BIM360
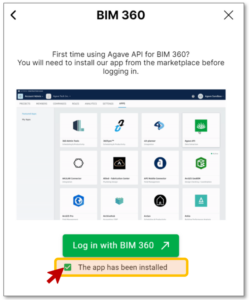
On the following BIM360 dialog box be sure to select the checkbox next to “The app has been installed” prompt before selecting the Log in with BIM360 button.
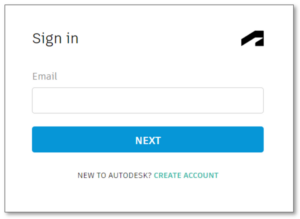
If prompted, sign into your Autodesk account.
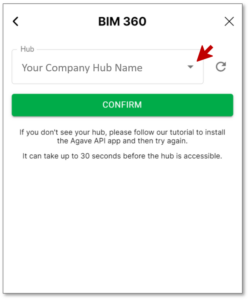
The next dialog box will provide a drop down list of your BIM360 hubs. Select the hub your project resides within and then select Confirm
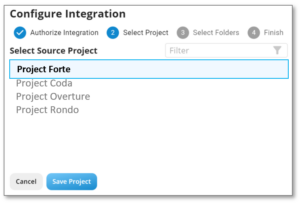
The next series of dialog boxes will help you configure your integration:
- Select your project from the project list on the next dialog box. The dialog box will make a suggestion if it finds a project with a similar name to the Concert project. If the project list is long there is a filter available to help you find your project. Select Save Project to continue
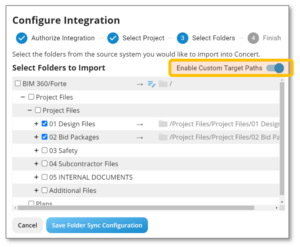
- Next, map which directories to transfer data from and their destination in the Concert asset repository.
- Concert will automatically create a matching folder structure or you can activate the Enable Custom Target Paths button to specify where you want the data files to go. This requires the target folders to have already been created in the project asset repository.
- Select the Save Folder Sync Configuration to continue
- The final dialog box will confirm your file source and destination selections as well as give you the option to Enable the integration. Enabling the integration will immediately start the transfer of data from Autodesk to Concert. If you wish to delay the file transfer to a later time then leave the box unchecked. Select Finish to continue

When enabled the integration will begin transferring data immediately. After that time Concert will sync new published data files once a day.
The integration setup is now complete and will be listed in the Settings/Integrations tab. This listing also provides some options to modify the integration including
- Enable/disable the integration,
- Sync Integration Now – forces a sync to occur (only if a sync is not currently underway)
- Modify the source and target directories
- Delete the integration

The delete option should only be taken if the integration is no longer needed. Anyone with project administration permissions can modify which folders to transfer should project needs change. Additionally, file transfers can be paused and re-enabled at any time with no limitations.